Getting Started
- What is M-Files?
- What is Metadata?
- The M-Files Way to Collaborate
- Accessing M-Files
- How to Save Documents
- How to Use Quick Search
- How to Modify Documents
- How to Share Documents
- Organizing with Views
- How to Use Views
- How to Use the Pinned Tab
M-Files Products
- Introduction to M-Files Mobile Application
- Introduction to M-Files Hubshare
- Introduction to M-Files for Microsoft Teams
- Introduction to M-Files Aino AI Assistant
- Introduction to Desktop Co-Authoring in M-Files
Beyond Basics
- Search Options
- Creating Views in M-Files
- Grouping Information
- How To Create Document Collections
- How to Create Multi-File Documents
- How To Create Relationships Between Objects
Tips and Tricks
- How to Create and Complete Assignments
- How to Create Notifications in M-Files
- How to Use and Create Document Templates
- How To Use Offline Mode in M-Files
- How to Change the Default Check-In Functionality
- How to Use Workflows in M-Files
- Permissions in M-Files
- How to Convert Documents to PDF Format
- How to Avoid Creating Duplicate Content in M-Files
- How to Co-Author Documents with Office 365

How to Save Documents
There are several ways you can save documents to and within M-Files. This lesson introduces you to the main ways you can bring your documents into M-Files and create new ones.
Adding Documents to M-Files
Dragging and dropping
The easiest way to add documents to M-Files is by dragging and dropping. Simply drag and drop an externally saved document into an empty space in the vault.
You can also drag and drop several documents at once if you wish. This is a good option if the documents are somehow related to each other and use much of the same metadata, like a set of documents belonging to the same customer project.
Dragging and dropping to replace existing documents
However, when dragging and dropping, it makes a difference where the documents are dropped.
If a document is dropped on top of another one that already exists in the vault, M-Files will ask if the contents of the existing one are to be replaced.
It’s a good practice to drag and drop documents in an empty area in the vault to avoid accidentally replacing any existing documents.
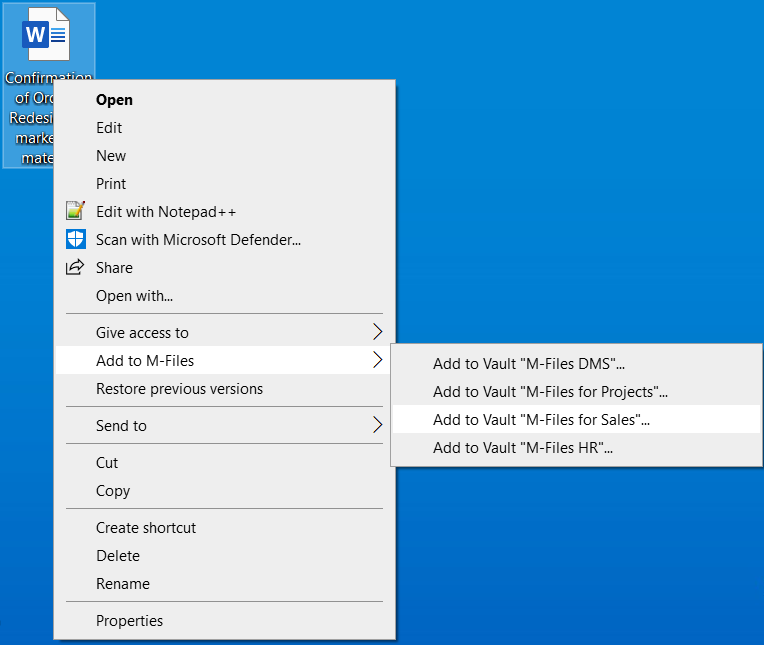
Adding documents by right-clicking
Another way to save information into M-Files is by locating the document in your drive, right-clicking and choosing Add to M-Files. From there you can add it to the desired vault.
This also applies when saving several files at once.
Using the M-Files Ribbon in O365 applications
If your organization has M-Files for Office 365 installed, you can use the Embedded M-Files Functionality in your Microsoft Office applications like Word, PowerPoint, Excel and so forth to save your documents in the vault.

Learn More about the M-Files Ribbon

Creating new documents in M-Files
Using the Create Menu
Documents and other objects can be created directly in M-Files, using the Create menu.
Whenever you create a document this way, there are several file types you can choose from, including Microsoft applications like Word and PowerPoint. You can also start with a blank document or you can choose a template from your organization’s template library.
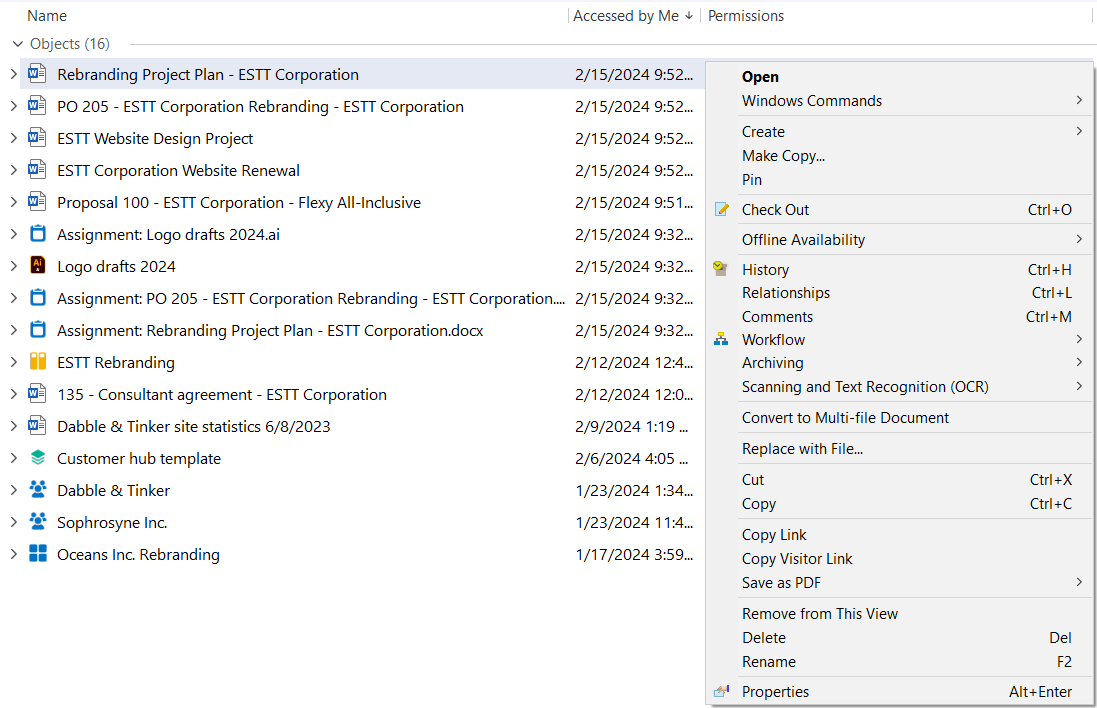
Copying an existing document
To make a copy of a document in M-Files, all you need to do is select that document, right-click, and select Make Copy.
This will copy the metadata and the contents of the original document, but they can be modified after making the copy.
Filling out the metadata card
No matter how you add or create your document, you have to fill out the metadata card. This information you fill in on the metadata card tells M-Files what this document is, what it relates to, and how it ought to be managed.
This metadata is the driving force of M-Files. It’s important to invest a few seconds to fill out the metadata card with all the relevant information. Filling in this metadata card property will ensure that the document is much easier to find later on.
Selecting a Class
The first piece of metadata you fill out is the class. This explains what kind of object this is. The list of classes you see in your vault is created by your organization. The ones you see in this tutorial guide will vary.
Filling in the metadata properties
Depending on the class you select, certain metadata properties will appear below it. Some of these properties are set by your organization as mandatory. You’re also able to add more properties if you like by selecting Add Property.
Review why filling in metadata is beneficial and important

Reusing metadata for several documents
When adding several documents simultaneously, the metadata for each document doesn’t have to be filled out separately, as M-Files has the option to use the same values as default for the next document.
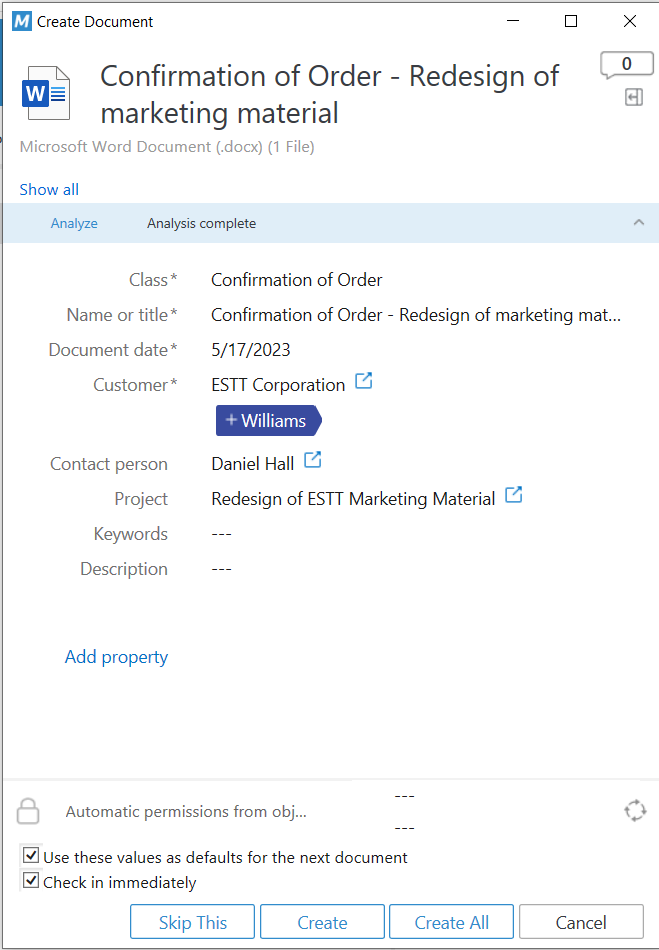
Check in immediately
Whenever you add or create a new document, you have the option to check in the document immediately. When this option isn’t selected, the document is automatically opened and checked out for editing and modification.

Learn about the M-Files way of modifying


FAQ
Got Questions?
All documents are saved to an M-Files vault. You can learn about vaults in the Accessing M-Files and M-Files Terminology guides.
In your M-Files vault, you don’t save by location, like a folder. You use metadata to save and organize your documents.
So to answer this question, you save your document to the vault by filling out the metadata card. But you don’t save it to a specific place in the vault. Remember from the introduction – it not about where the document is, it’s about what the document is.
If you’re used to saving documents by location (like in a folder), the M-Files way might seem odd at first. In M-Files, documents are saved and captured by metadata, not by location. So when you save a document in an M-Files vault, it’s not in any one specific location in the vault. Rather, it’s available and accessible in multiple ways.
You can find your documents through features like views, the Recent tab, search, the Pinned tab.
The rule of thumb is to fill out enough metadata so that a colleague can easily understand what this object is and what it relates to.
You cannot add or create classes directly from M-Files. The classes are set by your organization. You can speak with your M-Files Business Administrator if you’d like to add more classes that are suitable for your work.
We get it. If you’re used to just give a document a name and saving it somewhere, this can seem like extra work. However, we promise you that the seconds you invest in filling in this metadata will save you and your colleagues minutes, if not hours in the future when you need to find this document again.
M-Files is fully customizable. Therefore, every organization has its own tailor-fit version of M-Files. While the general layout of the interface might be similar, things like the create menu, common views, classes, and properties will be different and tailored for your organization. Even the colors might look different. It’s important to spend some time getting to know how your vault works.